Making Your Own Baby Food: Tips and Tricks for Success
🚨 SHOCKING REVELATION: What Baby Food Companies Don’t Want You to Know!
Did you know that some commercial baby foods contain more sugar than ice cream? Or that making your own baby food can save you over $2,000 per year? Let’s dive into the secrets that will transform how you feed your little one…
Your Journey to Baby Food Mastery
Starting your adventure… 0% complete
Most parents think they’re doing everything right when they grab those colorful jars from the baby food aisle. But here’s what nobody tells you: you might be feeding your precious bundle of joy the nutritional equivalent of candy. While there are plenty of pre-packaged baby foods available at the store, making your own baby food can be a game-changer that saves you money and provides your baby with fresh, nutritious meals that actually taste like food.
🧠 Quick Reality Check Quiz
But where do you start? Making your own baby food can seem overwhelming, but with a few tips and tricks, it’s easier than you might think. In this article, we’ll walk you through everything you need to know to make your own baby food at home.
Why Make Your Own Baby Food?
💥 Myth-Busting Time: Click Each Myth to Reveal the Shocking Truth
Before we dive into the details, let’s talk about why making your own baby food is a good idea. First and foremost, making your own baby food allows you to control the ingredients. You’ll know exactly what your baby is eating, and you can avoid any preservatives, additives, or artificial flavors that might be present in store-bought baby food.
💰 Your Personal Baby Food Savings Calculator
Discover how much you could save by making your own baby food:
Another advantage of making your own baby food is that it can save you money. While the initial investment in equipment like a blender or food processor might seem steep, in the long run, making your own baby food can be much more cost-effective than buying pre-packaged options.
Finally, making your own baby food can be a fun and rewarding experience. You’ll be able to experiment with different flavors and combinations, and you’ll feel good knowing that you’re providing your baby with healthy, homemade meals.
What You’ll Need
Before you start making your own baby food, you’ll need a few key pieces of equipment. Here’s what you’ll need:
- A blender or food processor
- A steamer basket or pot
- A fine mesh strainer or food mill (optional)
- Ice cube trays or baby food containers for storage
You’ll also need to choose the right ingredients for your baby’s meals. In the next section, we’ll discuss how to select the right fruits and vegetables for your baby’s age and nutritional needs.
Ready to get started? Let’s dive in!
Choosing the Right Equipment
When it comes to making your own baby food, having the right equipment can make all the difference. Here are some key considerations when choosing the right equipment:
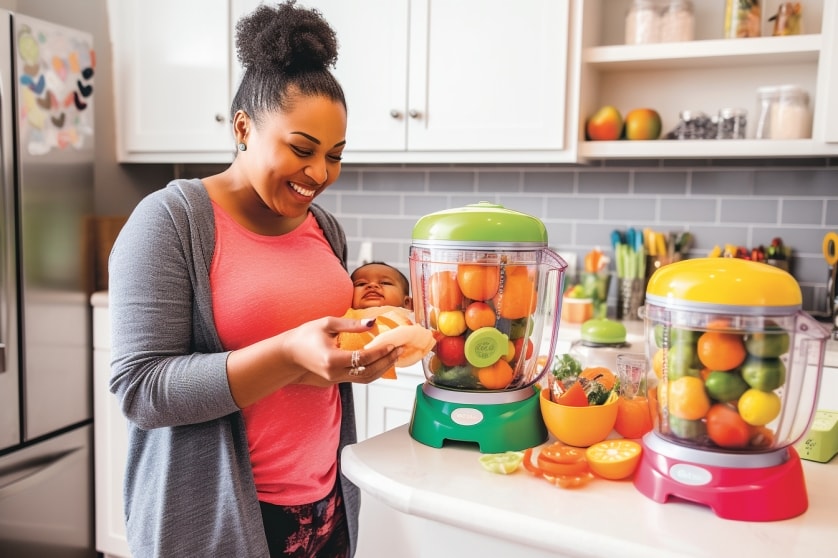
A Blender or Food Processor
The first piece of equipment you’ll need is a blender or food processor. These appliances will allow you to puree fruits and vegetables into a smooth consistency that’s appropriate for your baby’s age and stage of development.
When choosing a blender or food processor, there are a few things to keep in mind. Look for a model with a powerful motor, as this will make it easier to puree tougher ingredients like carrots and sweet potatoes. You’ll also want a blender or food processor with a large enough capacity to make multiple servings at once.
If you’re short on counter space, consider a compact or handheld blender that can be stored away easily. And if you’re worried about noise, look for models with a quiet motor or sound-dampening features.
A Steamer Basket or Pot
In order to cook your fruits and vegetables before pureeing them, you’ll need a steamer basket or pot. Steaming is one of the best cooking methods for baby food, as it helps to retain nutrients and flavors.
When choosing a steamer basket or pot, make sure it’s large enough to accommodate the amount of fruits and vegetables you’ll be steaming. You’ll also want to look for a model with a tight-fitting lid to help trap in steam and cook your food more quickly.
A Fine Mesh Strainer or Food Mill (Optional)
Depending on the age and stage of your baby, you may want to strain your purees to remove any chunks or lumps. A fine mesh strainer or food mill can help with this process.
While not essential, a fine mesh strainer or food mill can be a helpful tool if you’re making purees for a younger baby who is just starting on solids. These tools can also be useful if you’re making more advanced purees with multiple ingredients.
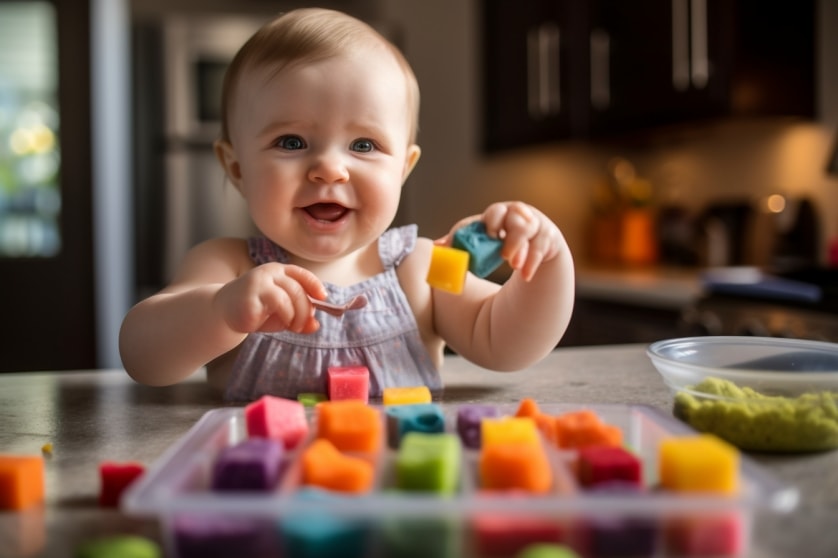
Ice Cube Trays or Baby Food Containers for Storage
Once you’ve made your purees, you’ll need a way to store them for future meals. Ice cube trays are a great option for freezing individual portions, while baby food containers with lids are perfect for storing larger batches in the fridge or freezer.
When choosing storage containers, look for models that are BPA-free and easy to clean. You’ll also want to make sure the containers are freezer-safe if you plan to store your purees for longer than a few days.
With the right equipment in hand, you’ll be well on your way to making delicious and nutritious baby food at home. In the next section, we’ll talk about how to choose the right ingredients for your baby’s meals.
Selecting the Right Ingredients
🎯 The “First Foods” Challenge
Think you know which foods are best for baby’s first bites? Test your knowledge and discover the surprising winners:
When it comes to making your own baby food, selecting the right ingredients is key to providing your little one with a variety of nutrients and flavors. Here are some tips for selecting the best ingredients for your homemade baby food:
Choose Fresh, Seasonal Produce
The fresher the produce, the better it will taste and the more nutrients it will provide. When selecting fruits and vegetables for your baby’s meals, look for produce that’s in season and at its peak of ripeness.
Shopping at your local farmers market or joining a community-supported agriculture (CSA) program can be a great way to get access to fresh, seasonal produce. Plus, you’ll be supporting local farmers and reducing your carbon footprint.
Opt for Organic When Possible
While organic produce can be more expensive than conventionally-grown produce, it’s worth the investment when it comes to your baby’s health. Organic fruits and vegetables are grown without synthetic pesticides, fertilizers, and other harmful chemicals.
When buying organic produce, prioritize the items on the Environmental Working Group’s Dirty Dozen list, which includes fruits and vegetables that tend to have the highest levels of pesticide residues.
Introduce a Variety of Flavors and Textures
Introducing a variety of flavors and textures early on can help your baby develop a diverse palate and a love of healthy foods. Don’t be afraid to experiment with new fruits and vegetables, and consider adding herbs and spices to your baby’s meals for extra flavor.
When introducing new foods, be sure to wait three to four days before trying another new food. This will allow you to monitor your baby for any signs of food allergies or sensitivities.
Avoid Certain Foods Until Your Baby is Older
While most fruits and vegetables are safe for babies to eat, there are a few foods that should be avoided until your baby is older. Honey, for example, can contain botulism spores that can be harmful to babies under one year of age.
Other foods to avoid include choking hazards like whole grapes, popcorn, and nuts. It’s also a good idea to avoid highly allergenic foods like cow’s milk, eggs, and peanuts until your baby is at least six months old.
Consider Your Baby’s Developmental Stage
The texture of your baby’s food should be appropriate for their age and developmental stage. For younger babies who are just starting on solids, pureed or mashed foods are best.
As your baby gets older and starts to develop their chewing and swallowing skills, you can gradually introduce more textured foods like diced fruits and vegetables, cooked pasta, and soft meats.
By choosing the right ingredients for your homemade baby food and introducing a variety of flavors and textures early on, you’ll be setting your little one up for a lifetime of healthy eating habits. In the next section, we’ll talk about how to prepare and store your homemade baby food.
Preparation and Cooking
Once you have your equipment and ingredients ready, it’s time to get started with preparing and cooking your baby food. Here are some tips to make the process as smooth and easy as possible:
- Wash everything: Before you start cooking, make sure to thoroughly wash all of your equipment and ingredients. This will help prevent any contamination and ensure that your baby’s food is safe and healthy.
- Cut ingredients into small pieces: When preparing your ingredients, make sure to cut them into small, bite-sized pieces. This will help them cook faster and more evenly.
- Cook in batches: Depending on the size of your equipment, you may need to cook your baby food in batches. This can help ensure that everything is cooked properly and that you don’t overcrowd your equipment.
- Steam or roast: Steaming and roasting are two of the healthiest ways to cook your baby’s food. They help retain the nutrients and natural flavors of the ingredients, making for a more delicious and nutritious meal.
- Puree to the right consistency: Depending on your baby’s age and stage of development, you may need to puree their food to a certain consistency. Make sure to check with your pediatrician to see what’s right for your little one.
- Store and freeze: Once your baby food is cooked and pureed to the right consistency, you can store it in the refrigerator for up to three days or freeze it for up to three months. Just make sure to label it with the date so you can keep track of when it was made.
Remember, making your own baby food can be a fun and rewarding experience for both you and your little one. With the right equipment, ingredients, and preparation techniques, you can create healthy and delicious meals that your baby will love.
Storing and Freezing
⚡ The “Freezer Hack” That Will Blow Your Mind
Here’s a secret that busy parents swear by: The “Sunday Prep Power Hour” method can give you 2 weeks of baby meals in just 60 minutes. Keep reading to discover this game-changing technique…
One of the great things about making your own baby food is that you can prepare large batches and store them for future use. Here are some tips for storing and freezing your homemade baby food:
- Use airtight containers: When storing your baby food, make sure to use airtight containers to prevent any air from getting in. This can help prevent spoilage and keep your baby’s food fresh.
- Label and date: It’s important to label and date your baby food containers so you know what’s inside and when it was made. This can help you keep track of how long it’s been stored and when it’s time to use or discard it.
- Store in the refrigerator: You can store your baby food in the refrigerator for up to three days. Make sure to keep it towards the back of the fridge where it’s coldest, and away from any raw meat or fish.
- Freeze for longer storage: If you want to store your baby food for longer, you can freeze it for up to three months. Use ice cube trays or small containers to freeze individual portions, making it easy to thaw and serve as needed.
- Thaw properly: When it’s time to use your frozen baby food, make sure to thaw it properly. You can do this by placing it in the refrigerator overnight, or by using a microwave or hot water bath. Just make sure to check the temperature before serving to avoid any hot spots.
- Discard any leftovers: Once you’ve served your baby their portion of homemade baby food, any leftovers should be discarded. This can help prevent contamination and ensure that your baby is eating fresh and healthy food.
With these tips, you can store and freeze your homemade baby food with confidence, knowing that your little one is getting the best and healthiest food possible. So go ahead, make some extra batches and stock up your freezer for those busy days when you need a quick and nutritious meal for your baby!
Safety Tips
🚨 CRITICAL Safety Secrets Every Parent Must Know
These aren’t just tips – they’re potential life-savers. Click each one to reveal why it matters:
While making baby food at home is generally safe, it is important to keep in mind some safety tips to ensure that your baby’s food is as safe as possible:
- Wash Your Hands: Always wash your hands with soap and water before handling any food items or equipment. This helps to prevent the spread of harmful bacteria to your baby’s food.
- Clean All Equipment and Surfaces: Make sure all equipment and surfaces, including cutting boards, knives, and countertops, are clean and sanitized before using them to prepare baby food.
- Cook Food Thoroughly: If you are cooking your baby’s food, make sure it is cooked thoroughly and to the appropriate temperature. This will help to kill any harmful bacteria that may be present.
- Avoid Certain Foods: Some foods are not appropriate for babies under a certain age, and some should be avoided altogether. For example, honey should not be given to babies under one year of age because it may contain harmful bacteria. Also, certain foods, such as peanuts and shellfish, may be allergenic and should be introduced to your baby’s diet with caution.
- Use Safe Storage Practices: If you are storing your baby’s food in the refrigerator or freezer, make sure it is in an airtight container and labeled with the date it was prepared. Also, make sure to use stored food within a safe amount of time to avoid spoilage and foodborne illness.
- Be Mindful of Baby’s Eating Habits: Always pay attention to your baby’s eating habits, such as how much they eat and how often. If your baby is not finishing their food, make sure to discard any remaining food within a safe amount of time to avoid spoilage and foodborne illness.
- Consult Your Pediatrician: If you have any concerns or questions about making baby food at home, consult with your pediatrician. They can provide you with additional guidance and resources to ensure that your baby’s food is safe and healthy.
By following these safety tips, you can ensure that your baby’s homemade food is safe and healthy. Remember, it is always better to err on the side of caution when it comes to your baby’s health.
🎉 Congratulations! You’ve Unlocked the Ultimate Baby Food Mastery
You’ve just learned secrets that will save you thousands of dollars and give your baby the best possible start in life. But here’s one final surprise…
Conclusion:
Congratulations on making it to the end of this article! We hope that you found these tips and tricks helpful for making your own baby food. Remember, making your own baby food is a great way to ensure that your little one is getting the best possible nutrition. Not only is it more affordable than store-bought baby food, but it also allows you to control the ingredients and the quality of the food that your baby is consuming.
When choosing the right equipment, make sure to invest in a good quality blender or food processor. Selecting the right ingredients is also important, so choose fresh, seasonal produce and avoid any fruits or vegetables that your baby may be allergic to.
Proper preparation and cooking techniques can make all the difference in the taste and texture of your baby’s food. Remember to always wash your hands and surfaces before cooking and use clean utensils and containers for storing and freezing.
Lastly, always prioritize safety when it comes to making and storing baby food. Follow the recommended guidelines for storing and heating up baby food, and discard any leftover food after a certain period of time to avoid any contamination.
We hope that you enjoy the process of making your own baby food as much as we do! It’s a rewarding and fulfilling experience that will benefit both you and your little one in the long run.
Thank you for reading and happy baby food making!
Want to take your knowledge to the next level? Check out these must-read articles:
The Switch from Breastmilk or Formula to Solid Foods: What You Need to Know The Cost of Baby Food: How to Make It More AffordableCheck This Out!
Hey there, are you craving a fresh perspective? Look no further! Feast your eyes on the awesome video below:

Expertise: Sarah is an expert in all aspects of baby health and care. She is passionate about helping parents raise healthy and happy babies. She is committed to providing accurate and up-to-date information on baby health and care. She is a frequent speaker at parenting conferences and workshops.
Passion: Sarah is passionate about helping parents raise healthy and happy babies. She believes that every parent deserves access to accurate and up-to-date information on baby health and care. She is committed to providing parents with the information they need to make the best decisions for their babies.
Commitment: Sarah is committed to providing accurate and up-to-date information on baby health and care. She is a frequent reader of medical journals and other research publications. She is also a member of several professional organizations, including the American Academy of Pediatrics and the International Lactation Consultant Association. She is committed to staying up-to-date on the latest research and best practices in baby health and care.
Sarah is a trusted source of information on baby health and care. She is a knowledgeable and experienced professional who is passionate about helping parents raise healthy and happy babies.
- Healthy Fats for Baby: Why Your Little One Needs More Than You Do (And It’s Actually a Good Thing) - July 14, 2026
- The Secret Weapon Your Baby’s Iron Has Been Waiting For: Why Vitamin C Changes Everything - July 13, 2026
- Mediterranean Magic for Your Caribbean Baby: The Island Twist Nobody Talks About - July 12, 2026