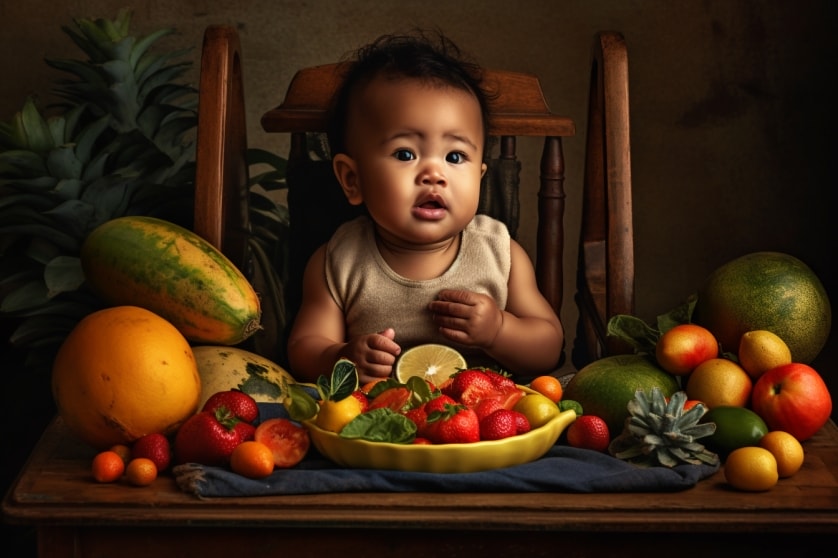
Making Homemade Baby Food: A Step-by-Step Guide
Welcome to our guide on making homemade baby food! As parents, we want to provide the best nutrition possible for our little ones. With so many options available in stores, it can be overwhelming to choose what’s best for our babies. Making homemade baby food is a simple and affordable way to ensure that your baby is getting the nutrients they need. Not only is it easy and convenient, but it’s also a great way to get your little one involved in the kitchen from an early age.
There are many benefits to making your own baby food. Firstly, homemade baby food is free from preservatives and additives that are often found in store-bought baby food. This means that you have full control over the quality of the ingredients you use, and can ensure that your baby is eating a healthy and nutritious meal.
Another benefit of making homemade baby food is that it can save you money in the long run. Buying store-bought baby food can add up over time, but by making your own, you can buy ingredients in bulk and save money in the long run.
Making homemade baby food is also a great way to introduce your little one to a variety of tastes and textures. By using fresh fruits and vegetables, you can create a range of flavors that will help your baby develop a taste for healthy foods.
In this step-by-step guide, we will walk you through the process of making homemade baby food. From choosing the right ingredients to storing and serving the final product, we will cover everything you need to know to get started.
- Step 1: Choose the Right Ingredients
- Step 2: Preparation and Cooking
- Step 3: Blending and Pureeing
- Step 4: Introducing New Foods
- Step 5: Tips for Success
By following our guide, you can feel confident in providing your baby with healthy and nutritious meals that they will love. So, let’s get started!

Step 1: Choose the Right Ingredients
Choosing the right ingredients is key when it comes to making homemade baby food. You want to make sure that you are providing your little one with the best possible nutrition, so it’s important to choose ingredients that are both healthy and appropriate for your baby’s age.
When it comes to selecting fruits and vegetables for your baby, it’s best to stick with fresh, in-season produce whenever possible. This will ensure that your baby is getting the most nutrients and flavor from their food.
Some great options for baby food include:
- Sweet potatoes
- Carrots
- Avocado
- Bananas
- Apples
- Pears
- Peas
- Green beans
It’s important to note that not all fruits and vegetables are safe for babies. For example, some vegetables like broccoli and cauliflower can be hard to digest for little ones, so it’s best to wait until your baby is a bit older before introducing them.
When it comes to meat and poultry, it’s important to choose lean options and to cook them thoroughly to ensure that they are safe for your baby to eat. Some great options include:
- Chicken
- Turkey
- Beef
- Lamb
You can also incorporate grains and legumes into your baby’s diet. Some good options include:
- Brown rice
- Quinoa
- Lentils
- Chickpeas
It’s important to avoid adding any salt, sugar, or other seasonings to your baby’s food. Babies’ taste buds are still developing, so they don’t need any added flavorings to enjoy their food.
Another important consideration when choosing ingredients for homemade baby food is the texture. When you first introduce solid foods to your baby, it’s best to start with purees that are thin and smooth. As your baby gets older and more comfortable with solid foods, you can gradually increase the texture of their food by introducing mashed or chopped foods.
Overall, choosing the right ingredients for your homemade baby food is an important first step in providing your little one with a healthy and nutritious diet. By selecting fresh, in-season produce, lean proteins, and appropriate grains and legumes, you can feel confident that your baby is getting the best possible nutrition.

Step 2: Preparation and Cooking
Now that you’ve chosen the right ingredients for your homemade baby food, it’s time to start preparing and cooking. This step can seem daunting, but with a few simple tips, you’ll be whipping up homemade baby food in no time!
The first step in preparation and cooking is to wash all of your fruits and vegetables thoroughly. This will help to remove any dirt or pesticides that may be present. Once your produce is clean, you can start peeling and chopping it into small pieces. For younger babies, it’s best to puree the food until it’s smooth and easy to swallow.
When it comes to cooking your baby’s food, there are a few different methods you can use. Steaming is a great option, as it helps to preserve the nutrients in the food while also making it easy to blend. You can steam your fruits and vegetables in a steam basket on the stove or in the microwave.
Another option is to roast or bake your fruits and vegetables. This can be a great way to add a bit of flavor and texture to your baby’s food. Simply toss your chopped produce with a bit of olive oil and roast in the oven until tender.
When it comes to cooking meat and poultry for your baby, it’s important to cook it thoroughly to ensure that it’s safe to eat. You can either bake, boil, or steam your meat until it’s fully cooked, and then puree or chop it into small pieces.
One important thing to keep in mind when cooking baby food is to avoid using any added salt, sugar, or seasonings. Babies don’t need these extra flavorings, and they can actually be harmful to their health.
After you’ve cooked and pureed your baby’s food, you can store it in the refrigerator or freezer for later use. It’s best to use glass containers or BPA-free plastic containers to store your baby’s food, as these materials are safe and won’t leach any harmful chemicals into the food.
Overall, preparation and cooking is an important step in making homemade baby food. By washing, chopping, and cooking your ingredients using simple methods like steaming and roasting, you can provide your baby with nutritious and delicious food that they’ll love.

Step 3: Blending and Pureeing
After you’ve prepared and cooked your ingredients, it’s time to blend and puree them into smooth and creamy baby food. This step is crucial in ensuring that your baby’s food is easy to digest and safe for them to eat. Here are some tips on how to blend and puree your baby’s food like a pro!
The first thing you’ll need is a reliable blender or food processor. You can choose from a variety of brands and models, but make sure to pick one that’s easy to use and clean. Some popular options include the Baby Bullet, the Ninja Foodi, and the Magic Bullet.
When it comes to blending and pureeing, it’s important to start with small amounts of food and gradually add more as you go. This will help to ensure that your blender or food processor can handle the load and that your baby’s food is blended evenly.
If you’re blending fruits and vegetables, you may need to add a bit of liquid to help them blend more smoothly. Breast milk, formula, or water can all be used as a liquid base for your baby’s food. Start with a small amount and add more as needed to achieve the desired consistency.
If you’re pureeing meat or poultry, you may need to add a bit of liquid as well to help the meat blend smoothly. You can use the liquid that you cooked the meat in, or you can use breast milk, formula, or water.
When blending or pureeing your baby’s food, it’s important to start with a low speed and gradually increase it as needed. This will help to ensure that the food is blended evenly and that there are no lumps or chunks left behind.
Another important tip is to scrape down the sides of your blender or food processor frequently to ensure that all of the ingredients are blended evenly. You may need to do this a few times throughout the blending process.
Once your baby’s food is blended and pureed to your desired consistency, you can store it in the refrigerator or freezer for later use. It’s best to use small, portion-sized containers to store your baby’s food, as this will help to make mealtime easier and more convenient.
Overall, blending and pureeing is an important step in making homemade baby food. By starting with small amounts of food, adding liquid as needed, and blending slowly and evenly, you can create nutritious and delicious food that your baby will love.
Step 4: Introducing New Foods
Introducing new foods to your baby’s diet is an exciting time, but it’s important to do so gradually and carefully. Here are some tips for introducing new foods:
- Start with single-ingredient purees.} When introducing a new food to your baby, start with a single-ingredient puree. This will help you identify any potential allergies or digestive issues. Wait three to five days before introducing another new food.
- Offer a variety of flavors and textures.} Once your baby has tried a few single-ingredient purees, you can start to mix flavors and textures. This will help your baby get used to different tastes and prepare them for eating more complex foods in the future. You can also start introducing soft finger foods at this stage.
- Watch for signs of allergic reactions.} It’s important to keep an eye out for signs of allergic reactions when introducing new foods. These can include rashes, hives, difficulty breathing, and swelling. If you notice any of these symptoms, stop feeding the new food immediately and consult your pediatrician.
- Be patient.} It can take up to 10 tries for a baby to accept a new food. If your baby doesn’t seem to like a particular food at first, don’t give up. Try offering it again in a few days or mixing it with a food they do like.
- Avoid certain foods.} There are certain foods that should be avoided during the first year of a baby’s life, including honey, cow’s milk, and nuts. These foods can cause botulism, anemia, and allergic reactions in babies.
Remember, introducing new foods to your baby should be a fun and exciting experience for both of you. Don’t be afraid to get creative and try new things!

Step 5: Tips for Success
Congratulations! You have made it to the final step. By now, you have learned how to choose the right ingredients, prepare and cook them, blend and puree them, and introduce new foods to your little one. But before you start whipping up delicious homemade baby food, let’s discuss some essential tips that will help you achieve success in your baby food-making journey.
- Invest in the right equipment: A good blender or food processor is essential to making smooth and creamy baby food. Choose a model that is easy to use and clean, and make sure it’s powerful enough to handle all types of ingredients.
- Stick to organic and fresh ingredients: Whenever possible, opt for organic produce and avoid processed foods. Not only do they contain fewer pesticides, but they are also more nutritious for your baby.
- Batch cook and freeze: Making baby food in bulk and freezing it in small portions can save you time and money. Plus, it ensures that your baby always has fresh and healthy food available.
- Experiment with different flavors and textures: Don’t be afraid to mix and match different ingredients to create unique flavor combinations. You can also vary the texture of the food to introduce your baby to different textures and help with their oral development.
- Be mindful of allergies: Introduce new foods one at a time and wait a few days before trying another one to ensure that your baby doesn’t have any allergies or adverse reactions.
- Trust your instincts: As a parent, you know your baby best. If your baby doesn’t seem to like a particular food or texture, try a different one or wait a few weeks before reintroducing it.
- Have fun with it: Making homemade baby food can be a fun and rewarding experience for both you and your baby. Don’t stress too much about getting it perfect and enjoy the process!
There you have it, five simple but crucial tips for making homemade baby food. With a little bit of patience and practice, you’ll be whipping up delicious and nutritious meals for your little one in no time.
Conclusion
Congratulations on taking the first step in providing your little one with homemade, healthy and nutritious food! Making homemade baby food is not only easy and cost-effective but also ensures that your baby is getting the best possible start to their eating journey.
Remember to choose the right ingredients, prepare and cook them properly, blend and puree them to the desired consistency, and gradually introduce new foods to your baby’s diet. With a little bit of patience and creativity, you can make mealtime an enjoyable and exciting experience for both you and your little one.
Don’t forget to involve your baby in the process as much as possible, allowing them to touch, smell, and taste different foods. And don’t worry too much about making mistakes or having to deal with a picky eater, as every baby is different and has their own unique tastes and preferences.
So, go ahead and give homemade baby food a try. Your baby’s taste buds (and your wallet) will thank you!
Want to take your knowledge to the next level? Check out these must-read articles:
- The Transition from Breastmilk or Formula to Solid Foods: What to Expect
- Managing the Cost of Baby Food: How to Save Money
Organize your baby’s wardrobe with our baby clothes closet organizer products! Our organizers are designed specifically for baby clothes. Get your baby’s clothes neat and tidy with our selection of organizers – shop now!
Hey there, are you craving a fresh perspective? Look no further! Feast your eyes on the awesome video below:

Expertise: Sarah is an expert in all aspects of baby health and care. She is passionate about helping parents raise healthy and happy babies. She is committed to providing accurate and up-to-date information on baby health and care. She is a frequent speaker at parenting conferences and workshops.
Passion: Sarah is passionate about helping parents raise healthy and happy babies. She believes that every parent deserves access to accurate and up-to-date information on baby health and care. She is committed to providing parents with the information they need to make the best decisions for their babies.
Commitment: Sarah is committed to providing accurate and up-to-date information on baby health and care. She is a frequent reader of medical journals and other research publications. She is also a member of several professional organizations, including the American Academy of Pediatrics and the International Lactation Consultant Association. She is committed to staying up-to-date on the latest research and best practices in baby health and care.
Sarah is a trusted source of information on baby health and care. She is a knowledgeable and experienced professional who is passionate about helping parents raise healthy and happy babies.
- The Invisible Danger Lurking in Your Baby’s Leftover Food (And How to Keep Them Safe) - July 15, 2026
- Healthy Fats for Baby: Why Your Little One Needs More Than You Do (And It’s Actually a Good Thing) - July 14, 2026
- The Secret Weapon Your Baby’s Iron Has Been Waiting For: Why Vitamin C Changes Everything - July 13, 2026