
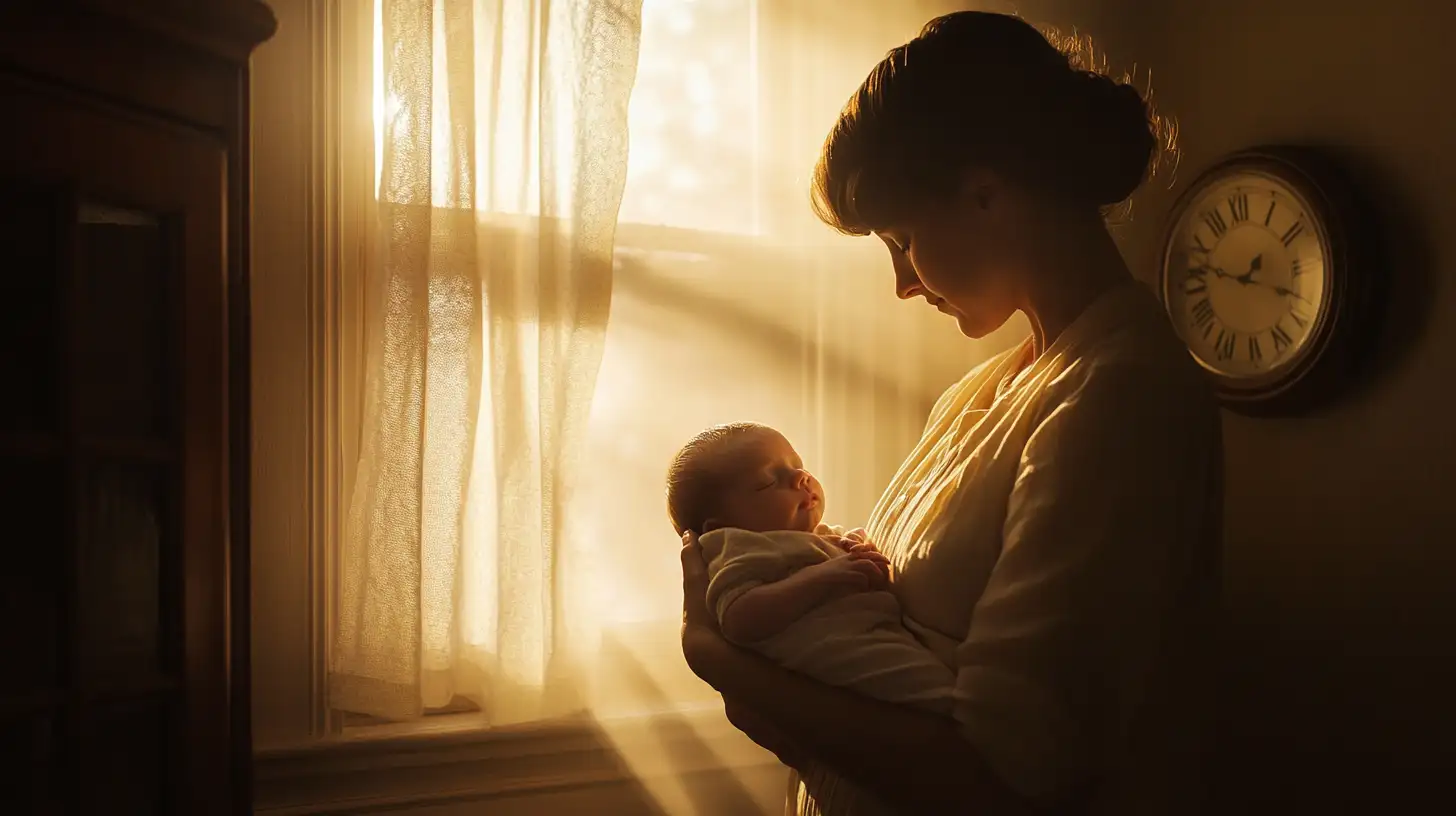
Capture Those Precious First Moments: Studio-Quality Newborn Photos Right in Your Living Room
Have you ever looked at those gorgeous newborn photos on social media and thought, I could never take pictures like that of my baby? Maybe you’ve convinced yourself that without expensive camera equipment or professional training, those dreamy, heartwarming shots are simply out of reach. I used to believe the same thing until a series of sleepless nights with my firstborn changed everything.
When my daughter was born, I desperately wanted to document every tiny detail—those miniature fingers, the peaceful sleeping face, the fleeting newborn expressions that seem to disappear in the blink of an eye. But between recovering from birth, adjusting to parenthood, and functioning on minimal sleep, professional photography sessions felt overwhelming and out of reach.
So I made a choice that transformed not just my photo albums but how I experienced those early weeks of parenthood. I stopped waiting for the perfect setup. I stopped believing I needed professional gear. I stopped comparing my photos to the ones filling my Instagram feed.
And you know what? The photos I captured during those quiet moments at home became our most treasured memories. Better yet, the process of taking them allowed me to slow down and truly see my baby during a time that otherwise feels like it passes in a blur.
In this post, I’m going to share with you the techniques that helped me capture studio-quality newborn photos right at home—techniques that cost nothing but a little time and attention. Because here’s the truth: the most powerful tool in newborn photography isn’t an expensive camera or fancy props—it’s your connection to your baby and understanding a few simple principles.
The Golden Hour: Timing Your Newborn Photoshoot for Success
When it comes to newborn photography, timing isn’t just important—it’s everything. And I don’t just mean the age of your baby, though that matters too. I’m talking about finding that perfect window during your day when both you and baby are in the right headspace for a mini photo session.
Back home in Trinidad, my grandmother always said, The morning light brings truth to everything it touches. There’s wisdom in that when it comes to newborn photography. The soft, golden light of morning often creates the most flattering illumination for those delicate newborn features.
Here’s what I discovered works best:
- Schedule your mini photo sessions for 30-60 minutes after a feeding when baby has a full belly and is naturally drowsy
- Look for the time of day when natural light fills your home—usually mid-morning or late afternoon
- Aim to capture photos during the first two weeks of life when your newborn is most sleepy and naturally curls into those adorable poses
- Pay attention to your baby’s mood cycles—some babies are calmest in the morning, others in the early afternoon
- Keep sessions short—10-15 minutes is often enough to get several beautiful shots without overwhelming you or baby
I remember trying to force a photoshoot when my little one was fussy, thinking I’d miss my chance if I didn’t do it right then. What a mistake! The photos from that session show a tense, uncomfortable baby. But the ones we took the next morning, after she’d nursed and was drifting into that milk-drunk sleep? Pure magic.
The secret is to work with your baby’s natural rhythms rather than against them. When you align with their calm periods, photography becomes less of a production and more of a natural extension of your bonding time.
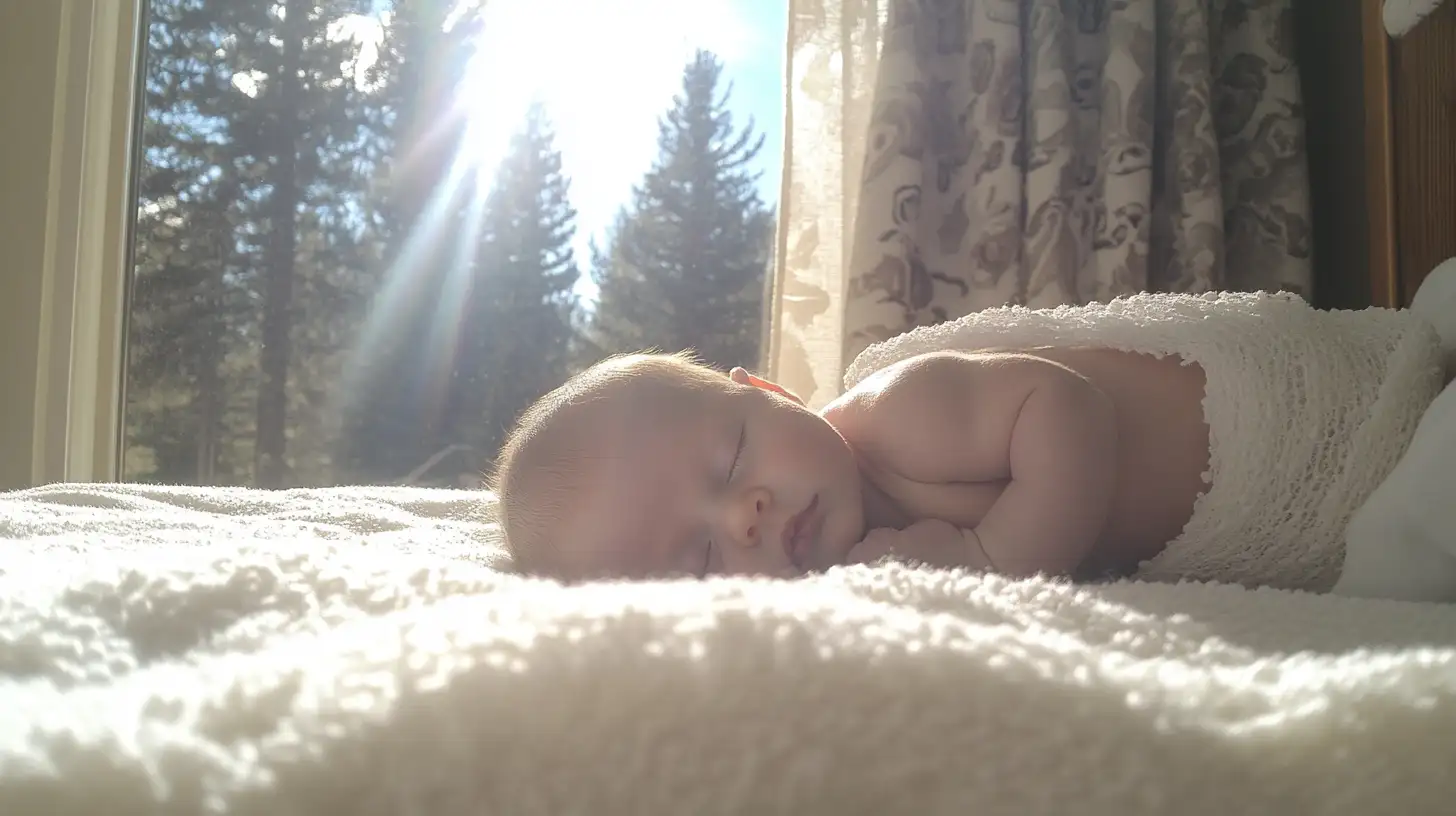
Light Like a Pro: Creating Studio-Quality Lighting With What You Have
This may sound crazy, but professional lighting setups aren’t what you need to create stunning newborn portraits. Have you ever noticed how the most captivating baby photos have this soft, dreamy quality to them? That doesn’t come from expensive equipment—it comes from understanding how to use the light already streaming through your windows.
When I was growing up in the Caribbean, my home was filled with this gentle, diffused sunlight that seemed to soften everything it touched. You can recreate this effect in your own home by positioning your baby near (but not directly in) natural light sources.
Here’s how to create that professional lighting effect:
- Find the largest window in your home and position your setup about 45 degrees to it—never directly under harsh sunlight
- If the sunlight is too intense, hang a white sheet or use sheer curtains to diffuse it
- Create a simple studio by placing a bed, sofa, or padded floor space near this light source
- For evening sessions, avoid your home’s overhead lighting (which creates harsh shadows) and instead use a lamp with a white lampshade positioned at a 45-degree angle to your baby
- Use a white poster board or foam core board on the opposite side of your light source to bounce light back onto the shadowed side of your baby’s face
I discovered this by accident one afternoon when my daughter was napping on our bed next to a north-facing window. The light wrapped around her features so beautifully that the photos I took with just my phone camera looked like they came from a professional studio.
The most powerful thing about mastering light is that it instantly elevates even smartphone photos to look professional. When you stop chasing fancy equipment and start seeing the beautiful light already present in your home, you’ve already won half the battle in newborn photography.
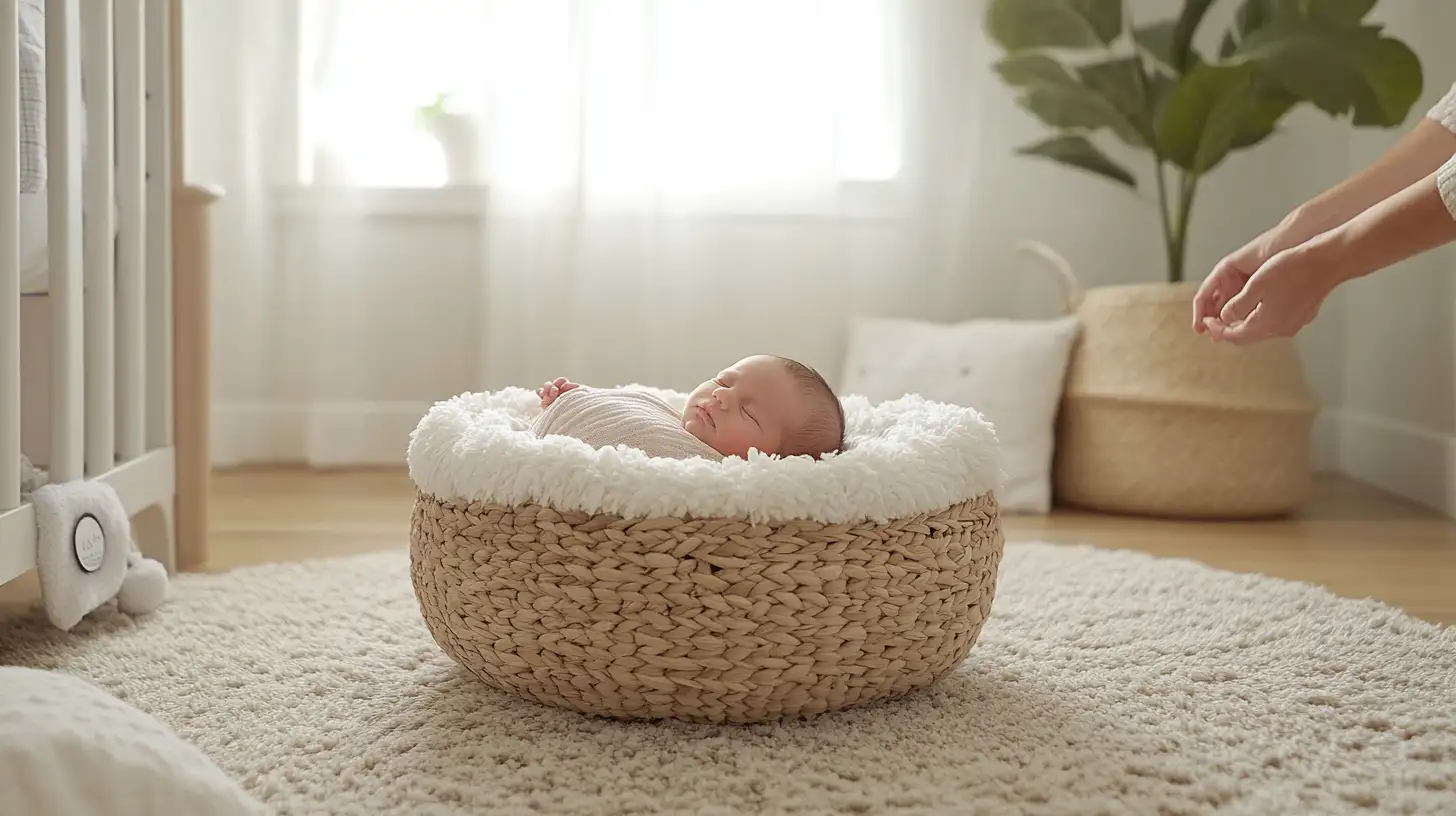
Safety First: Creating Photo-Worthy Setups Without Risking Your Precious One
Let me be clear about something—those Pinterest-perfect newborn photos where babies are balanced in precarious positions or props? They’re usually composite images or taken by professionals with years of experience and safety assistants standing by. But that doesn’t mean you can’t create equally beautiful, completely safe images at home.
I learned this lesson the hard way when I tried to recreate a cute hanging in a hammock pose I saw online. Halfway through setting it up, I realized I was putting my desire for a cute photo above my baby’s safety. That was my wake-up call.
Here’s how to create stunning, safe setups for your newborn photos:
- Never pose your baby in any position they can’t naturally maintain on their own
- Always have a spotter (your partner or helper) within arm’s reach for any posed shots
- Use the composite approach—take one photo of your safely-positioned baby and another of just the prop or backdrop, then combine them later if you want that floating effect
- Create depth with layers of soft blankets on a firm surface rather than precarious props
- Keep your setup low to the ground—never pose your baby on elevated surfaces without proper safety measures
- Maintain proper room temperature (around 80°F/27°C) as naked newborns lose body heat quickly
One of my favorite safe setups came from a simple basket lined with a blanket that I placed directly on the floor. I surrounded it with pillows and had my husband stand guard, though he never needed to intervene. The photos captured that nestled feeling without any risk.
Because here’s the thing: when you put safety first, you’re free to be present and creative rather than anxious. The most beautiful newborn expressions come when both baby and photographer are relaxed and comfortable. And no photo, no matter how cute the concept, is worth putting your precious one at risk.

Composition That Tells Your Story: Framing Shots Like a Professional
At the heart of every captivating newborn photo isn’t just a cute baby—it’s thoughtful composition that draws the viewer’s eye exactly where you want it to go. And I think this is where most parents feel the most intimidated. We look at professional photos and think there’s some secret formula we don’t understand.
But composition isn’t about rules—it’s about seeing. It’s about noticing the story within the frame and highlighting what matters most.
When I lived near the beach in Barbados, I learned that the most beautiful photos weren’t of the entire coastline—they were close-ups of a single shell, the curve of a wave, the texture of sand. The same principle applies to your newborn:
- Get close—really close—to capture details like eyelashes, tiny fingernails, or the perfect curve of their ear
- Try the rule of thirds by positioning your baby’s eyes or face at the intersection points rather than dead center
- Create visual interest by shooting from slightly above, directly to the side, or even from below (when safe)
- Include elements that show scale—your hands cradling their tiny feet, your partner’s finger wrapped in their miniature grip
- Look for natural framing elements in your home—doorways, window frames, or the curve of a bassinet
- Simplify your backgrounds to keep the focus on your baby—a solid-colored blanket often works better than busy patterns
I discovered the power of composition one quiet morning when I noticed how my daughter’s hand naturally curled around my finger while she slept. Instead of trying to pose her, I simply adjusted my angle to capture that natural connection. The resulting photo says more about our bond than any elaborate setup ever could.
Remember this: when you embrace your unique perspective as a parent, you’ll capture moments a professional photographer might miss entirely. The way your baby looks at you, the specific way they curl up when content—these details tell your family’s unique story.
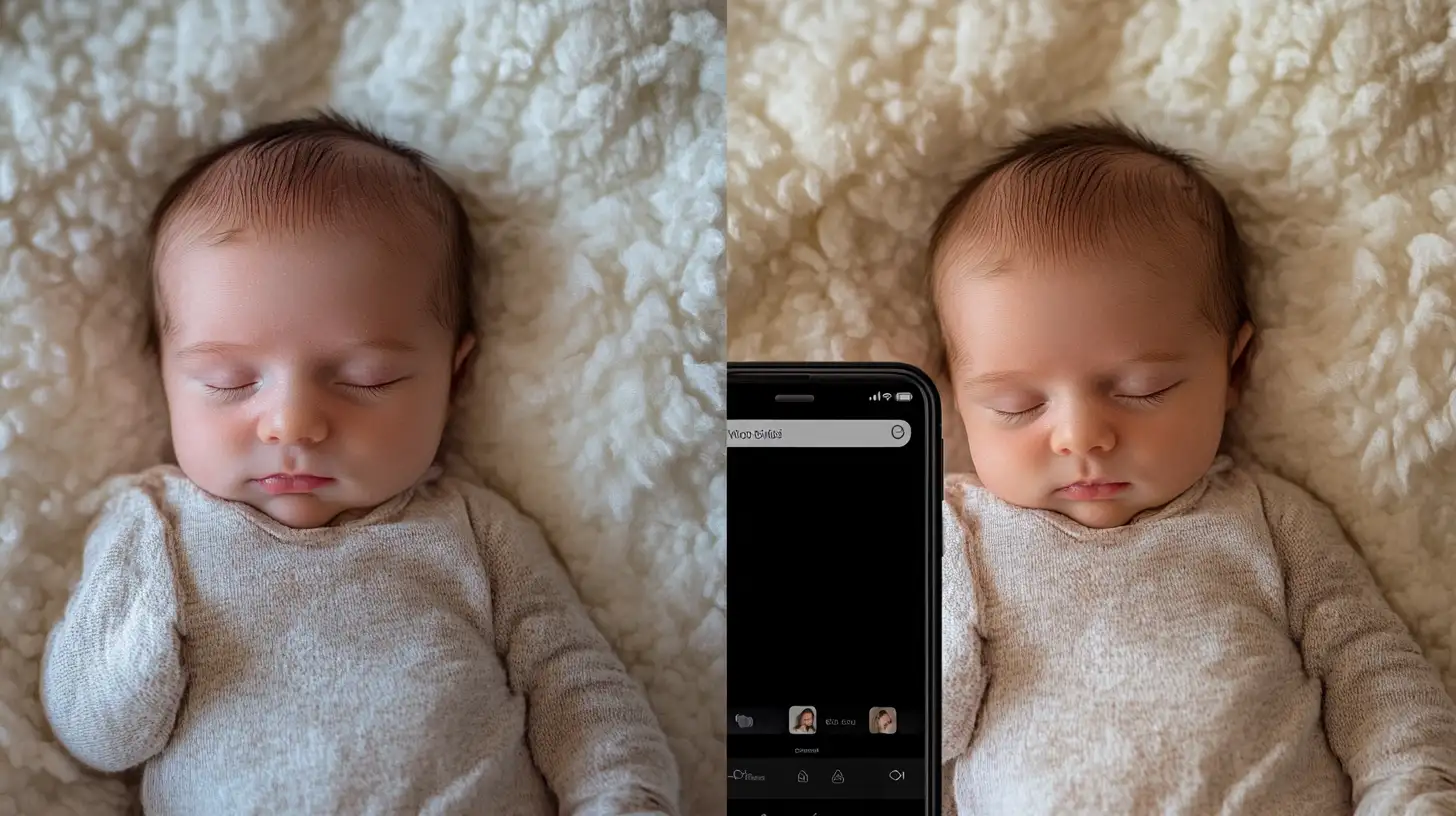
Beyond the Basics: Editing Magic Anyone Can Master
Now, I used to overthink editing. I thought if I just had the right presets or knew all the technical adjustments professionals use, my photos would magically transform. But in reality, over-editing was just holding me back from sharing the beautiful images I’d already captured.
Here’s the biggest mistake most parents make: we think editing means completely transforming an image. But the most natural, timeless newborn photos need just a few simple adjustments to shine.
You don’t need expensive software or complicated techniques. With just your smartphone and free editing apps, you can create that professional polish:
- Start with good lighting when taking the photo—this reduces how much editing you’ll need later
- Use the basic adjustment tools in free apps like Snapseed or even your phone’s built-in editor
- Slightly increase brightness and warmth to create that soft, cozy feeling that complements newborn skin
- Convert some images to black and white to create timeless portraits that hide minor imperfections
- Use the healing tool to gently remove temporary newborn skin flakes or redness (but leave those beautiful birthmarks and unique features)
- Create consistency in your photo collection by applying similar adjustments to all images from the same session
One evening, I was looking through photos from my daughter’s first week and feeling disappointed that they didn’t have that professional glow. On a whim, I simply increased the warmth and slightly brightened the shadows in one image. Suddenly, it transformed from a snapshot to a portrait that captured exactly how I saw her—perfect and luminous.
The irony here is that the less you manipulate your newborn photos, the more timeless and authentic they become. When you’re no longer trying to make every image Instagram perfect, you start to see the beauty in the natural moments you’ve captured.
The Real Secret to Unforgettable Newborn Photos
After all the techniques I’ve shared, here’s what I want you to remember most: the truly unforgettable newborn photos aren’t about perfection—they’re about presence.
My grandmother used to say, We don’t remember days, we remember moments. Your baby won’t stay this tiny forever. Those wrinkly feet will soon smooth out. That vernix-covered skin will soon clear. That particular newborn expression that melts your heart? It might be gone next week.
So while you’re positioning the light and thinking about composition, don’t forget to put down the camera sometimes. Be fully there. Notice the weight of your baby in your arms, the specific sound of their breathing, the way their eyelashes rest against their cheeks.
Because the real power of newborn photography isn’t just in documenting how your baby looks—it’s in helping you truly see them during a time that otherwise passes in a sleep-deprived blur.
And here’s something I never expected: the process of photographing my newborn didn’t just give me beautiful images to treasure. It taught me to slow down and notice details I might have missed in the rush of new parenthood. It became a form of mindfulness that transformed those early weeks from overwhelming to awe-inspiring.
Whenever you’re reading this, I want you to have the courage to pick up whatever camera you have—even if it’s just your phone—and start documenting those fleeting newborn moments today. Because if you’ve loved your baby fully, if you’ve seen them clearly, then you’ve already captured what matters most.
The technical details will improve with practice. Your eye for composition will develop over time. But those first precious weeks? They’re happening right now. And the most beautiful thing about newborn photography is that it helps you be fully present for them.
Step into Sue Brown's World of Baby Care, where you'll find a treasure trove of knowledge and wisdom waiting to be explored. Sue's dedication to providing accurate and up-to-date information on baby care shines through in every article, blog post, and resource she shares. From newborn essentials to sleep training tips, breastfeeding advice to nurturing your baby's development, Sue covers a wide range of topics that are essential for every parent to know. Her warm and compassionate approach creates a sense of community and reassurance, making her website a safe haven for parents seeking guidance and support. Let Sue Brown be your partner in this beautiful journey of parenthood, as she empowers you to create a loving, nurturing, and thriving environment for your little one.
- Indoor Air Quality for Infant Respiratory Health - October 20, 2025
- Positive Discipline Foundations: Setting the Stage From Infancy - October 18, 2025
- 2025’s Most Innovative Baby Products Worth the Investment - October 16, 2025