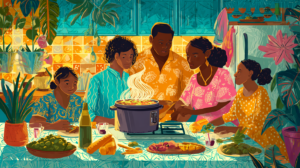
Making Your Own Baby Food: Simple and Cost-Effective Solutions
As parents, we all want the best for our little ones, and that includes their nutrition. Making your own baby food can seem daunting, but it’s easier than you might think. Not only is it a cost-effective solution, but it also allows you to control the ingredients and ensure that your baby is getting the freshest, healthiest food possible.
But let’s be real, the idea of making your own baby food can be overwhelming. It’s hard enough to find time to shower or eat, let alone puree a bunch of carrots. But trust us, it’s worth it.
- Benefits of Homemade Baby Food: When you make baby food at home, you have complete control over what goes into it. You can choose the freshest, healthiest ingredients and avoid any harmful additives or preservatives. Plus, you can customize the flavors and textures to your baby’s preferences.
- Nutritional Value: Studies have shown that homemade baby food is often more nutritious than store-bought options. That’s because the food is fresher and hasn’t undergone the same processing and pasteurization as commercial baby food.
- Environmental Impact: Making your own baby food is also better for the environment. You can choose to buy local and organic produce, reducing your carbon footprint and supporting sustainable agriculture.
Now, we know you’re probably thinking, But I don’t have time to make my own baby food! That’s where we come in. We’ve put together a guide to help you make homemade baby food that’s simple, cost-effective, and won’t take up too much of your precious time.
So, let’s get started. With a little bit of planning and preparation, you’ll be on your way to providing your baby with delicious and nutritious homemade food in no time.

Choosing the Right Tools and Ingredients
Now that you’re ready to dive into the world of homemade baby food, it’s important to have the right tools and ingredients. Don’t worry, you don’t need a fancy kitchen or a degree in nutrition to get started. With a few simple tools and some fresh produce, you’ll be on your way to whipping up delicious meals for your little one.
The Tools You’ll Need
- Blender or Food Processor: A blender or food processor is essential for pureeing fruits and vegetables. You don’t need to splurge on a high-end model; a basic blender or food processor will do the trick. However, if you’re planning on making a lot of baby food, investing in a high-quality blender or food processor can save you time and make the process more efficient.
- Steamer Basket: A steamer basket is another must-have tool for making homemade baby food. Steaming is a great way to preserve the nutrients in fruits and vegetables while also softening them for easy pureeing. You can either use a steamer basket on your stove or invest in a baby food maker with a built-in steamer.
- Ice Cube Trays: Ice cube trays are a convenient way to portion out your baby food. Simply puree your fruits and vegetables, pour the mixture into the ice cube trays, and freeze. Once the cubes are frozen, you can transfer them to a resealable bag and store them in your freezer for up to three months.
The Ingredients to Choose
When it comes to choosing ingredients for your homemade baby food, the possibilities are endless. Here are a few tips to keep in mind:
- Choose Fresh, Organic Produce: Whenever possible, choose fresh, organic produce for your baby’s food. This will ensure that your baby is getting the highest-quality ingredients with no harmful additives or pesticides.
- Start with Single-Ingredient Purees: When you’re first introducing solids to your baby, it’s best to start with single-ingredient purees. This will help you identify any allergies or intolerances your baby may have.
- Experiment with Flavors: Don’t be afraid to mix and match different fruits and vegetables to create unique flavor combinations. Just make sure to introduce new foods one at a time to ensure that your baby doesn’t have an adverse reaction.
- Don’t Forget the Protein: As your baby grows, it’s important to include protein in their diet. You can puree cooked meat, fish, or tofu for your baby, or mix in a spoonful of plain Greek yogurt for added protein.
Remember, making your own baby food is all about experimenting and finding what works best for you and your little one. Don’t stress too much about getting it perfect the first time around. With a little bit of practice, you’ll become a pro at whipping up delicious and nutritious meals for your baby.

Preparing and Storing Baby Food
Congratulations, you’ve made your own baby food! Now, it’s time to prepare and store it properly to ensure that it stays fresh and safe for your little one to eat.
Preparing Baby Food
- Cooking: Start by cooking your fruits and vegetables until they’re soft. You can do this by steaming, baking, boiling, or roasting, depending on the type of produce you’re using. Make sure to remove any seeds, skins, or pits before pureeing.
- Pureeing: Once your fruits and vegetables are cooked, puree them in a blender or food processor until they’re smooth. You can also add a bit of water, breast milk, or formula to thin out the puree if needed.
- Portioning: Using ice cube trays or small containers, portion out the puree into serving sizes that work for your baby. Label each container with the type of food and the date it was made.
Storing Baby Food
Proper storage is key to keeping your homemade baby food fresh and safe for your little one to eat. Here are a few tips:
- Refrigerator: You can store your homemade baby food in the refrigerator for up to three days. Make sure to use an airtight container and label it with the type of food and the date it was made.
- Freezer: If you want to store your baby food for longer, you can freeze it. Transfer the puree to a resealable freezer bag or container, making sure to label it with the type of food and the date it was made. Baby food can be frozen for up to three months.
- Thawing: When you’re ready to serve the frozen baby food, simply thaw it in the refrigerator overnight. You can also thaw it in the microwave or in a bowl of warm water, but make sure to stir it well and check the temperature before serving.
Additional Tips
Here are a few additional tips to keep in mind when preparing and storing your homemade baby food:
- Be Hygienic: Make sure to wash your hands, utensils, and equipment thoroughly before preparing baby food. This will help prevent the spread of harmful bacteria.
- Don’t Reheat: Once you’ve heated up baby food, don’t reheat it again. This can cause harmful bacteria to grow and can make your baby sick.
- Discard Uneaten Food: If your baby doesn’t finish a serving of baby food, discard any leftovers. Don’t save them for later, as this can also lead to the growth of harmful bacteria.
With these tips and tricks, you’ll be a pro at preparing and storing your own homemade baby food in no time. Not only is it cost-effective and convenient, but it’s also a great way to ensure that your little one is getting the freshest and most nutritious food possible.

Introducing Solids and Flavor Combinations
Introducing solids to your baby can be an exciting and nerve-wracking time for parents. It’s important to remember that every baby is different and may have different preferences when it comes to flavors and textures. The key is to introduce a variety of flavors and textures gradually.
Start with Single-Ingredient Purees
When introducing solids to your baby, it’s best to start with single-ingredient purees. This will help you determine if your baby has any allergies or intolerances to specific foods. It’s also easier to identify the cause of any digestive issues if you introduce only one new food at a time.
Some great first foods to try include avocado, sweet potato, banana, butternut squash, and pear. Cook or steam the food until it’s soft and blend it in a food processor or blender until it’s smooth.
Gradually Introduce New Flavors and Textures
After your baby has tried a few single-ingredient purees and seems to be tolerating them well, you can start to mix flavors and textures. For example, you can mix sweet potato and apple or butternut squash and carrot.
Try introducing new foods gradually to avoid overwhelming your baby. You can also mix in some breast milk or formula to add familiarity and help with the transition.
Get Creative with Flavor Combinations
Once your baby is comfortable with a variety of single-ingredient purees and mixed flavors, you can start to get creative with flavor combinations. Some popular combinations include:
- Spinach, pear, and kiwi
- Mango, banana, and coconut milk
- Carrot, apple, and ginger
- Blueberry, peach, and yogurt
Be sure to introduce new foods gradually and watch for any signs of allergic reactions or digestive issues.
Offer Finger Foods
As your baby gets older and more comfortable with solids, you can start to offer finger foods. This can help with their hand-eye coordination and introduce new textures and flavors.
Some great finger foods to try include soft cooked veggies like broccoli and sweet potato, soft fruits like ripe banana and mango, and cooked grains like rice and quinoa.
Remember, introducing solids is a gradual process, and it’s important to be patient and watch for any signs of allergic reactions or digestive issues. With time, your baby will become more comfortable with solids and develop their own preferences and tastes.

Making Baby Food On-The-Go
One of the most common challenges that parents face when it comes to feeding their babies homemade food is making it on-the-go. Fortunately, there are many ways to make homemade baby food while you’re out and about. Here are some tips:
- Investing in the Right Tools: One of the easiest ways to make baby food while you’re out is to invest in the right tools. Portable blenders, food mills, and even hand-cranked food processors are all great options for making baby food on-the-go. These tools are lightweight, compact, and easy to use, making them perfect for travel.
- Prep Ahead: Another key to making baby food on-the-go is to prep ahead. This means preparing your baby’s meals in advance, so they’re ready to go when you need them. You can make batches of baby food at home and then portion them out into small, resealable containers for easy transport.
- Choose the Right Foods: When it comes to making baby food on-the-go, it’s important to choose foods that are easy to prepare and transport. Soft fruits like bananas, avocados, and mangoes are perfect for mashing up on-the-go, while steamed vegetables like sweet potatoes, peas, and carrots can be easily pureed with a portable blender or food mill.
- Pack the Essentials: When you’re making baby food on-the-go, it’s important to pack the essentials. This includes your baby’s food, utensils, bibs, and wipes for cleanup. You may also want to bring along a portable high chair or booster seat if you’re planning on eating out.
- Be Creative: Finally, don’t be afraid to get creative when it comes to making baby food on-the-go. You can mix and match different fruits and vegetables to create unique flavor combinations, or add spices like cinnamon, ginger, or turmeric for added flavor and nutrition. The key is to have fun and experiment with different ingredients until you find what works best for you and your baby.
With these tips and tricks, making baby food on-the-go has never been easier. Whether you’re traveling with your little one or just running errands, you can rest easy knowing that your baby is getting healthy, homemade meals.

Troubleshooting and Common Concerns
Even with the best preparation and intentions, making baby food can still come with its fair share of challenges. Here are some common concerns and troubleshooting tips to help you overcome them:
Problem: Baby won’t eat the homemade food
Solution: It’s not uncommon for babies to reject new foods, especially if they’re used to a certain taste or texture. Don’t give up on a food after just one attempt. Instead, try offering it again in a few days or weeks. You can also mix it with a food your baby already enjoys or use a different cooking method to change the texture.
Problem: Food spoils quickly
Solution: Homemade baby food typically has a shorter shelf life than store-bought options. To extend the life of your homemade baby food, make sure to store it properly in airtight containers and in the fridge or freezer as soon as possible after cooking. Additionally, don’t leave food out at room temperature for more than two hours.
Problem: Food has a gritty or lumpy texture
Solution: Smooth texture is key for babies just starting on solids. Make sure to puree the food well, using a blender or food processor if necessary. You can also strain the food through a fine mesh sieve to remove any lumps or bumps.
Problem: Food is too watery
Solution: If the food is too watery, you can thicken it with some baby cereal or by cooking it down further. Alternatively, you can add less water or cooking liquid when preparing the food in the first place.
Problem: Baby is constipated after eating the food
Solution: Certain foods can cause constipation in babies, such as bananas and rice cereal. If you notice your baby is having trouble with bowel movements after eating a certain food, try reducing the amount or frequency of that food or removing it from their diet altogether.
Problem: Not enough time to make baby food
Solution: Making baby food doesn’t have to be an all-day affair. With a little planning, you can easily incorporate it into your routine. Try making a big batch on the weekend and freezing it in individual portions for the week ahead. Or, make extra portions of the food you’re already making for your family and set them aside for your baby’s meals.
By being aware of these common concerns and solutions, you’ll be better equipped to handle any challenges that come up in the process of making homemade baby food.
Conclusion
Congratulations, you are now a baby food-making pro! By following the simple and cost-effective solutions in this article, you can easily prepare nutritious and delicious meals for your little one. Not only is making your own baby food more affordable than buying pre-packaged options, but it also allows you to control the ingredients and flavors that your baby is exposed to.
Remember, don’t be too hard on yourself if you encounter any bumps in the road. It’s natural for babies to be picky eaters, and introducing new foods can take some time. The most important thing is to have fun with the process and enjoy watching your little one discover new flavors and textures.
If you have any concerns about your baby’s nutrition or growth, always consult with your pediatrician. They can provide valuable guidance and ensure that your baby is getting all the nutrients they need.
Thank you for taking the time to read this article. We hope that it has been helpful and informative, and that you feel empowered to start making your own baby food. Happy cooking!
Want to take your knowledge to the next level? Check out these must-read articles:
- From Breastmilk to Solids: A Parent’s Guide to the Transition
- Managing the Expense of Baby Food: Budget-Friendly Tips for Parents
Organize your baby’s wardrobe with our baby clothes closet organizer products! Our organizers are designed specifically for baby clothes. Get your baby’s clothes neat and tidy with our selection of organizers – shop now!
Hey there, are you craving a fresh perspective? Look no further! Feast your eyes on the awesome video below:

Expertise: Sarah is an expert in all aspects of baby health and care. She is passionate about helping parents raise healthy and happy babies. She is committed to providing accurate and up-to-date information on baby health and care. She is a frequent speaker at parenting conferences and workshops.
Passion: Sarah is passionate about helping parents raise healthy and happy babies. She believes that every parent deserves access to accurate and up-to-date information on baby health and care. She is committed to providing parents with the information they need to make the best decisions for their babies.
Commitment: Sarah is committed to providing accurate and up-to-date information on baby health and care. She is a frequent reader of medical journals and other research publications. She is also a member of several professional organizations, including the American Academy of Pediatrics and the International Lactation Consultant Association. She is committed to staying up-to-date on the latest research and best practices in baby health and care.
Sarah is a trusted source of information on baby health and care. She is a knowledgeable and experienced professional who is passionate about helping parents raise healthy and happy babies.
- When Your Body Says “No”: Breaking Free from Breastfeeding Guilt and Finding Your Peace - June 22, 2026
- The Shocking Truth About Caribbean Spices Your Baby Can Actually Eat (Before Age One) - June 21, 2026
- Your Instant Pot Is About to Become Your Baby’s Secret Weapon (And Save You 10+ Hours a Week) - June 20, 2026